


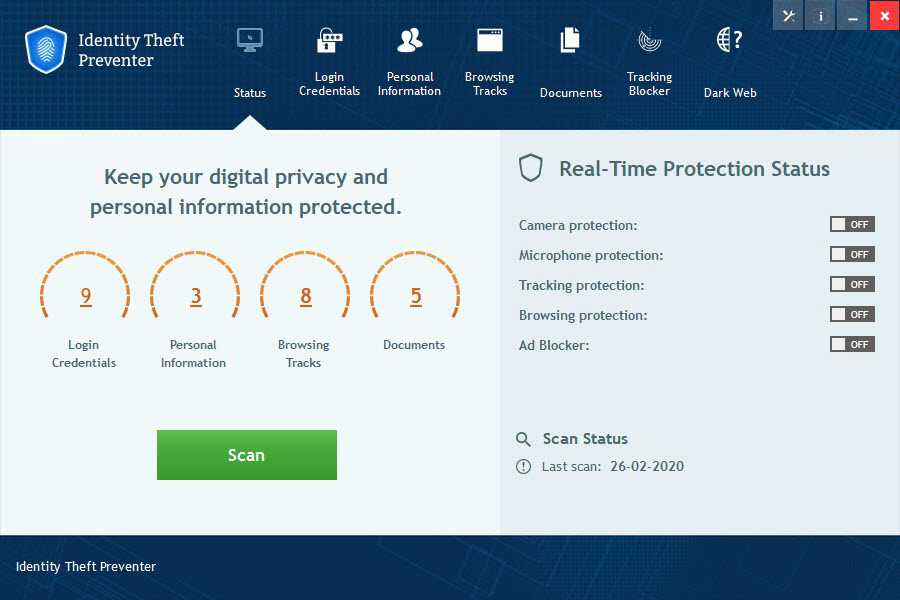
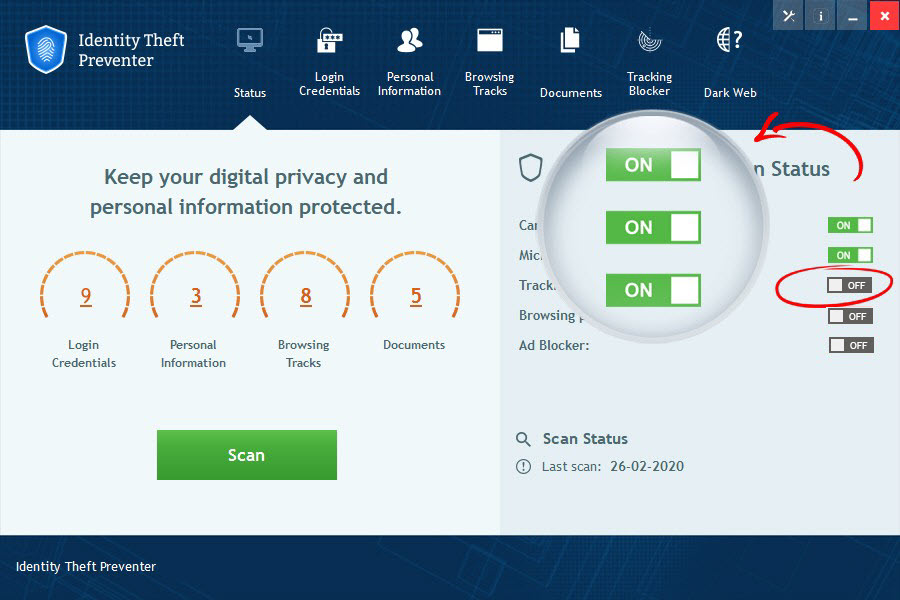
The Main Screen
How to run a scan with Identity Theft Preventer
– After the first installation Identity Theft Preventer will initiate an automated first full scan.
– You can initiate full scans from the main screen by clicking the Scan button,
or alternatively run category-specific scans from within each category tab.
What do these scans mean? What are these reported records?
Identity Theft Preventer will scan and report back with a list of records that entail sensitive information
present within your locally stored personal documents (such as bank statements and medical bills), logged credentials
to your preferable online accounts (banks, social media, web mail etc) and more. These records are considered sensitive
as they include or provide information that may put your privacy in jeopardy. These are not viruses,
and do not necessarily need to be deleted – but – we strongly recommend reviewing the results and encrypting them
into the vaults provided within the software to make sure they are highly secured and not discoverable and approachable by others.
How to activate the webcam protection
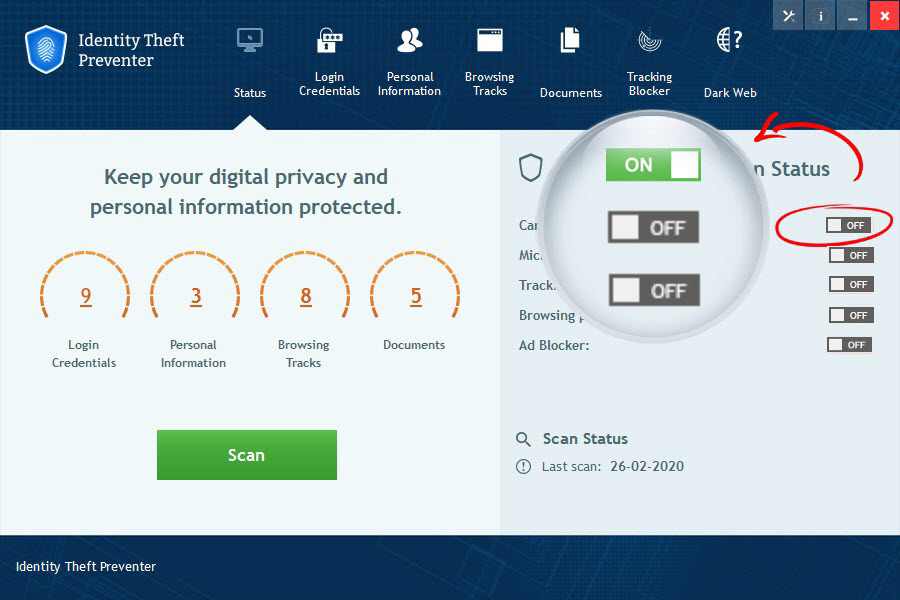
– If Identity Theft Preventer detects your installed webcam, the webcam protection switch will turn red.
– To turn the webcam protection on, click the switch.
– When on, the switch will turn to green and your webcam will be protected.
How to deactivate the webcam protection
– To turn the webcam protection off, click the green switch.
– When off, the switch will turn to red and your webcam will not be protected.
How to activate the microphone protection

– If Identity Theft Preventer detects your installed microphone, the microphone protection switch will turn red.
– To turn the microphone protection on, click the switch.
– When on, the switch will turn to green and your microphone will be protected.
How to deactivate the microphone protection
– To turn the microphone protection off, click the green switch.
– When off, the switch will turn to red and your microphone will not be protected.
How the set up the tracking protection
The tracking protection feature requires the Identity Theft Preventer’s browser extensions to be installed and active on your browsers.
These are included as part of your trial and premium license.
– A click on the tracking protection switch will point you to the Tracking Blocker tab and automatically initiate the extension wizard.
– Identity Theft Preventer will detect your browsers (Google Chrome, Mozilla Firefox and Microsoft Edge)
and will display detailed instructions to assist you with the needed extension installations.
All you need to do is follow the few simple steps displayed.
– After installing the relevant extension, click the on/off switch to enable or disable the anti-tracking protection.
For your convenience, you can control each browser’s protection status selectively.
Turning the browsing protection on/off
Once the setup steps above have been completed, all you need to do is click the ‘Browsing Protection’
switch from the main screen to turn it on or off.
What does the browsing protection do? Why do I need it?
Your digital information and web-behavior are being constantly monitored, logged and tracked every day.
The gathered information can then be processed, sold, and used to monetize your web activity by various 3rd parties.
When the anti-tracking feature is on, Identity Theft Preventer will proactively scramble your digital fingerprint and block profiling attempts
by data miners and hackers so your web-habits and personally identifiable information cannot be collected and abused.
How to set up the Ad Blocker

The ad blocking feature requires the Identity Theft Preventer’s browser extensions to be installed and active on your browsers.
These are included as part of your trial and premium license.
– A click on the ad blocker switch will automatically initiate the extensions wizard if they have not been already installed.
If they have – the ad blocking will simply turn on.
– Identity Theft Preventer will detect your browsers (Google Chrome, Mozilla Firefox and Microsoft Edge) and will display detailed
instructions to assist you with the needed extension installations. All you need to do is follow the few simple steps displayed.
– After installing the relevant extension, click the on/off switch to enable or disable the ad blocker.
Turning the Ad Blocker protection on/off
Once the setup steps above have been completed, all you need to do is click the ‘Ad Blocker’ switch
from the main screen to turn it on or off.
What does the Ad Blocker do? Why do I need it?
The ad blocker feature provides both convenience and security. When turned on, you can surf the web safely
and conveniently without being annoyed by flashing banners and distracting ads. Furthermore, the ad blocking feature will block
both static and dynamic banners, making your browsing experience smoother, faster and safer – disabling misleading banners
that may lead to malicious websites or initiate rouge downloads of sorts.